
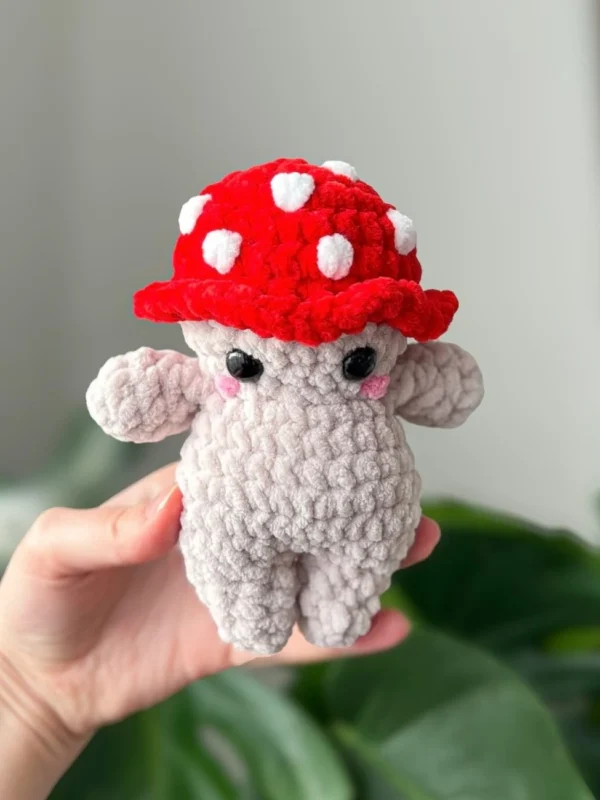
Designer: Mia Stitch Studio
These cheeky mushrooms are especially fun to make if you’re reaching something reasonably quickly. This takes just under two hours to finish; it is written in US crochet terms and will be worked in continuous rounds. You can keep track of the rounds with a stitch marker.
This tutorial starts by making the cap, then working on the body and head, followed by making the leg all in one piece, then making the arms separately and attaching them to the body part, and then embroidering the white spots on the mushroom cap.
You can place it in woodland, cottage core, or nature- themed décor setups, and add to handmade gift boxes for a playful touch.
Materials
- 5 mm crochet hook
- Super bulky chenille yarn (size 6) in colors: red, white, beige, pink
- 12 mm safety eyes
- Scissors
- Polyester stuffing
- Stitch marker
- Sewing needle
Size: 15 cm
Abbreviations
Mr – magic ring
sc – single crochet
inc – increase
dec – decrease (invisible)
ch – chain
FLO – front loops only
BLO – back loops only
sl st – slip stitch
Arms x2
Crochet in beige:
Rnd 1: 8 sc in Mr (8)
Rnd 2-3: sc around (8)
Rnd 4: (2 sc, dec) x 2 (6)
Stuff the arms lightly
Rnd 5: sc around (6)
Fold the arms in half and sc 3 through the folded edge to close the opening.
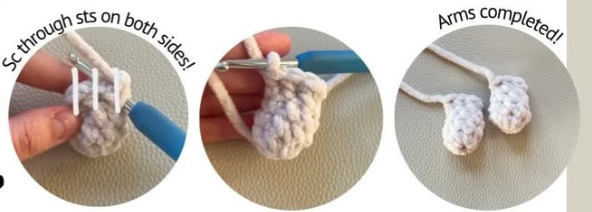
Cut a short tail. We will sc the arms to the body later,
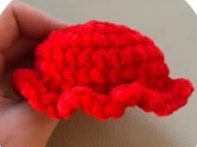
Mushroom Cap
Crochet in red.
Rnd 1: 7 sc in Mr (7)
Rnd 2: inc around (14)
Rnd 3: (1 sc, inc) x 7 (21)
Rnd 4: (2 sc, inc) x 7 (28)
Rnd 5-6: sc around (28)
Rnd 7: FLO: inc around (56)
Sl st and weave in the end.
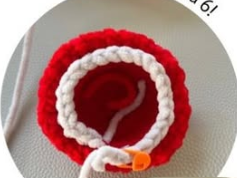
Head & Body
Make a sl st with beige yarn in the visible BLO sts.
Rnd 8: BLO of rnd 6: (5 sc, dec) x 4 (24)
Rnd 9: sc around (24)
Rnd 10: (2 sc, dec) x 6 (18)
Rnd 11: (1 sc, dec) x 6 (12)
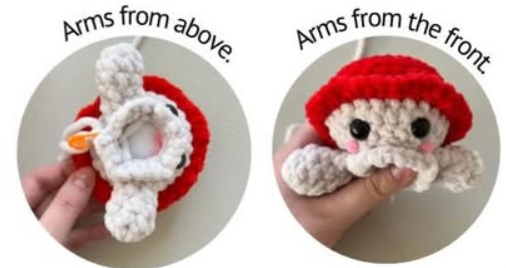
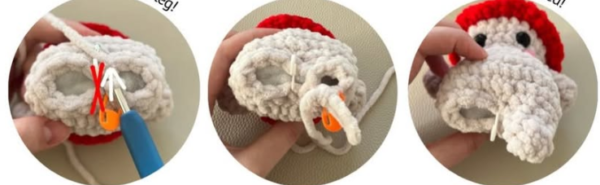
In the next round we will sc the arms into the body.
Rnd 12: FLO: ARMS with 3 inc, 4 inc, ARMS with 3 inc, 2 inc (24)
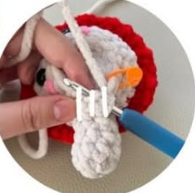
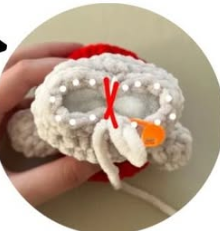
Insert safety eyes in between rnd 9-10, 4 visible stitches apart. Sew blush under the eyes.
Stuff the head. Start crocheting the body.
Rnd 13-14: sc around (24)
Rnd 15: (3 sc, inc) x 6 (30)
Rnd 16: sc around (30)
Rnd 17: (3 sc, dec) x 6 (24)
Rnd 18: (1 sc, dec) x 8 (16)
Stuff the body.
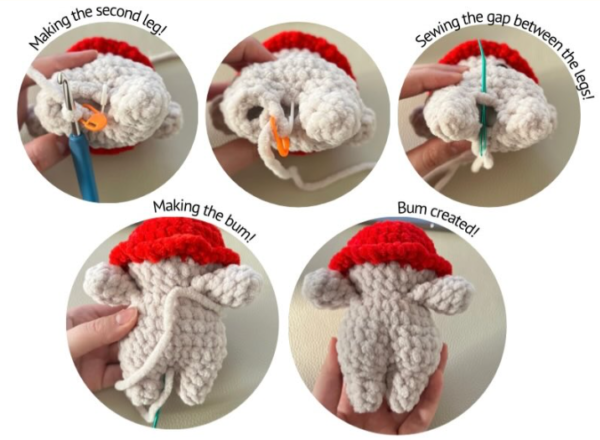
Legs x2
Fold the body in half to create two legs.
Use stitch markers to separate the legs. The white stitch marker shows the center line and separate the 2 legs. You will now have 2 sections, 1 for each leg.
We will crochet 7 sc in each leg.
Start with the right leg, which is where your yarn is currently attached (marked with orange stitch marker).
Right Leg
Rnd 1: sc around, do not sc in the sts where the white stitch marker is placed (7)
Rnd 2-3: sc around (7)
Stuff the leg and body.
Rnd 4: 3 dec, 1 sc (4)
Fasten off and weave in the end.
Left Leg
Make a sl st in the st close to the white st marker.
Rnd 1: sc around, do not sc in the sts where the white stutch maerke is placed (7)
Rnd 2-3: sc around (7)
Finish stuffing the legs and body.
Rnd 4: 3 dec, 1 sc (4)
Fasten off and leave a long tail for sewing.
Sew the gap between the legs.
With the same yarn tail, insert your needle from the bottom center and bring the yarn up about 3-4 rounds higher on the back of the body. This forms the bumm shape. Repeat this a few times in the same path to secure the shaping.
Fasten off and weave in the end.
Mushroom Spots
In white yarn.
- Cut a long piece of white yarn and thread it onto your needle.
- Choose a st on the mushroom cap that is about one st wide and insert the needle through it.
- Bring the needle down one st below and insert it back through the same spot where you started.
- Repeat this process, pasing the yarn through the same st 3-4 times to create a small spot.
- Continue making spots randomly across the mushroom cap.
Fasten off and weave in the ends.

