Designer: Alidoescrochet
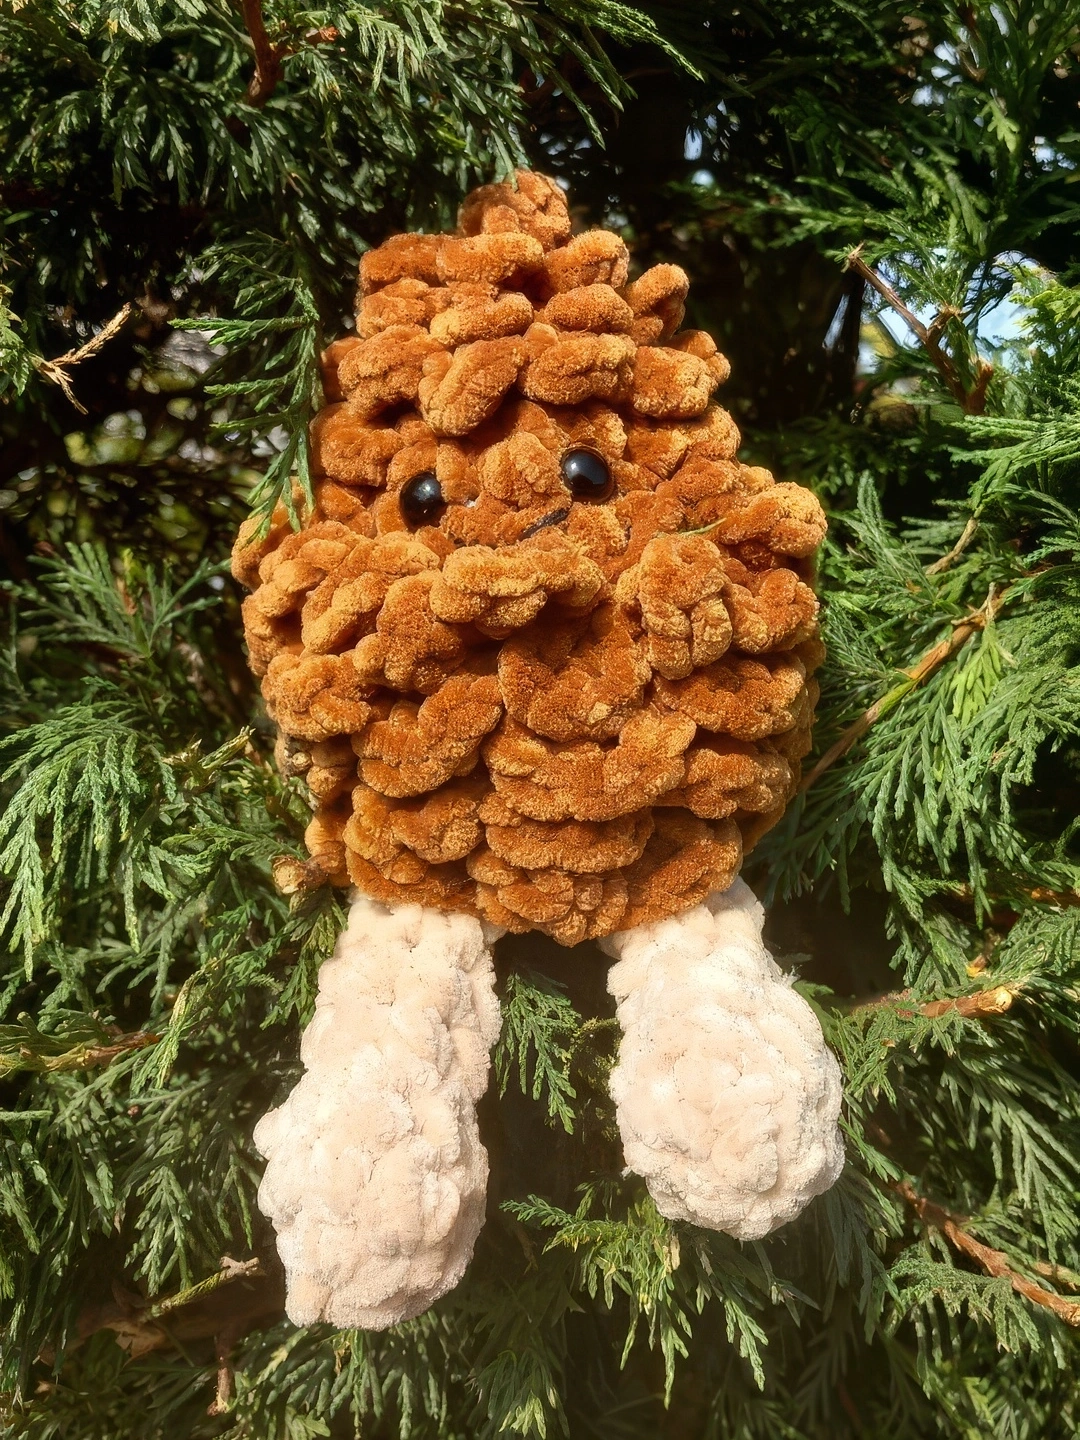
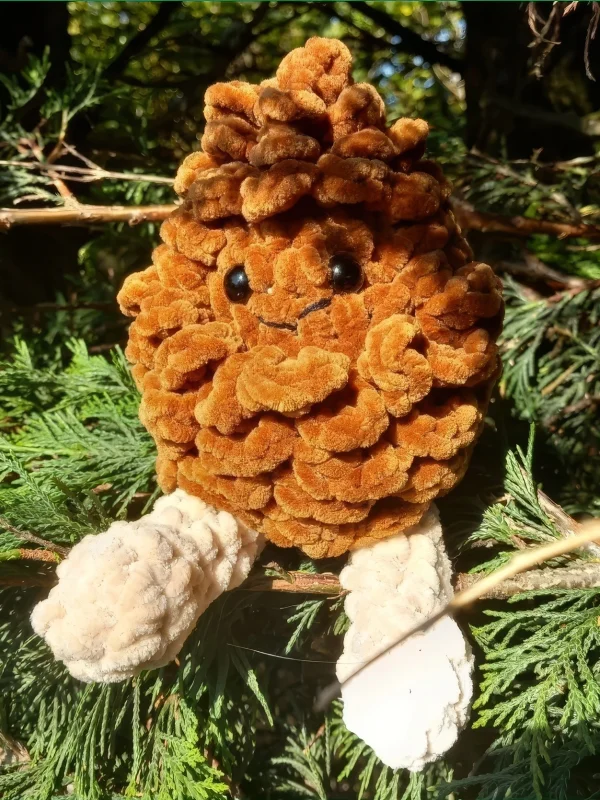
A simple and fun project to bring a little woodland charm to your crochet creations! A little forest friend with curly brown scales and two chubby cream legs. He looks so soft and huggable that you will want to take him on every autumn walk with you.
This free pattern uses US crochet terminology and is worked in two parts: the body part and the two legs part.
This tutorial is beginner-friendly, so all you need to know to finish this tutorial is how to make single crochet stitches, double crochet stitches, treble crochet stitches, and some crochet techniques like increasing, decreasing, and working in the front & back loops only.
This tiny crochet pine cone with a cute and natural design is perfect for autumn decorations, Christmas displays, or adding something unique to your amigurumi collection
Materials
- Yarnsmitchs Chenille yarn
- 4.5 mm crochet hook
- Stitch markers
- Stuffing
- Scissors
- Safety eyes
- Sewing needle
Abbreviations
Mr – magic ring
sc – single crochet
inc – increase
dec – decrease
hdc – half double crochet
dc – double crochet
trc – treble crochet
sl st – slip stitch
BLO – back loops only
FLO – front loops only
Body
Start with main color.
Rnd 1: 4 sc in Mr (4)
Rnd 2: sc around (4)
Rnd 3: (1 sc, inc) x 2 (6)
Rnd 4: FLO (sl st, ch 2 and in the second ch from hook sl st. sl st back into the original FLO st) x 6 (6)
Rnd 5: in BLO of R3 (2 sc, inc) x 2 (8)
Rnd 6: FLO [sl st, ch 2 and in the second ch from hook sl st, sl st back into the original FLO st] x 8 (8)
Rnd 7: in BLO of R6 (3 sc, inc) x 2 (10)
Rnd 8: FLO: [sl st, ch 1, hdc, ch 1, sl st all in one FLO st] x 10 )1-_
Rnd 9: in BLO of R8 (2 sc, inc) x 3, sc (13)
Rnd 10: FLO: [sl st, ch 1, hdc, ch 1, sl st] x 4 both loops 5 sc, FLO (sl st, ch 1, hdc, ch 1, sl st) x 4 (13)
Rnd 11: BLO of R10 3 sc, inc, 1 sc, both loops 2 sc, inc, 2 sc, BLO 1 sc, inc, 1 sc (16)
Rnd 12: FLO: [sl st, ch 1, hdc, ch 1, sl st] x 5 both loops 6 sc, FLO [sl st, ch 1, hdc, ch 1, sl st] x 5 (16)
Insert safety eyes between rounds 10 and 11, 3 visible stitches apart.
Rnd 13: BLO of R12: 5 ssc, both loops: 6 sc, BLO 5 sc
Rnd 14: FLO: [sl st, ch2, dc, ch2, sl st all in one FLO st] x 16 (16)
Rnd 15: BLO of R14 (3 sc, inc) x 4 (20)
Rnd 16: FLO: [sl st, ch2, dc, in next st dc, ch2, sl st] x 10 (20)
Rnd 17: BLO of R16, sc aorund (20)
Rnd 18: FLO: [sl st, ch2, dc, in next st dc, ch2, sl st] x 10 (20)
Rnd 19: BLO of R18 sc around (20)
Rnd 20: FLO: [sl st, ch2, dc, in next st dc, ch2, sl st] x 10 (20)
Rnd 21: BLO of R20: (3 sc, dec) x 4 (16)
Rnd 22: (2 sc, dec) x 4 (12)
Rnd 23: (1 sc, dec) x 4 (8)
Rnd 24: dec x 4 (4)
Stuff. Fasten off and close up the hole.
Legs x2
Start with tan color.
Rnd 1: 6 sc in Mr (6)
Rnd 2: (1 sc, inc) x 3 (9)
Rnd 3: sc around (9)
Rnd 4: (1 sc, dec) x 3 (6) Stuff foot.
Rnd 5-11: sc around (6)
Fold in half and sc across the edge.
Assembly
- Sew legs to the bottom of the body, the feet should be sticking out at the front of the body.