Designer: Crochet by Alice
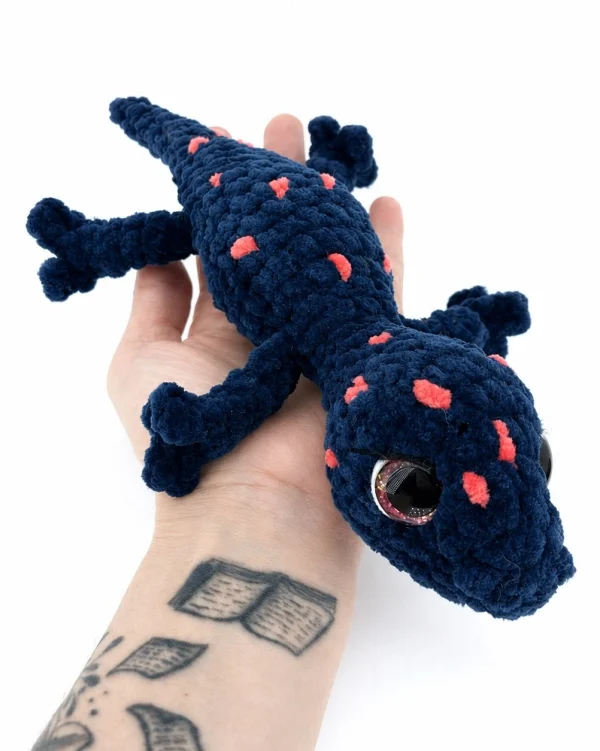
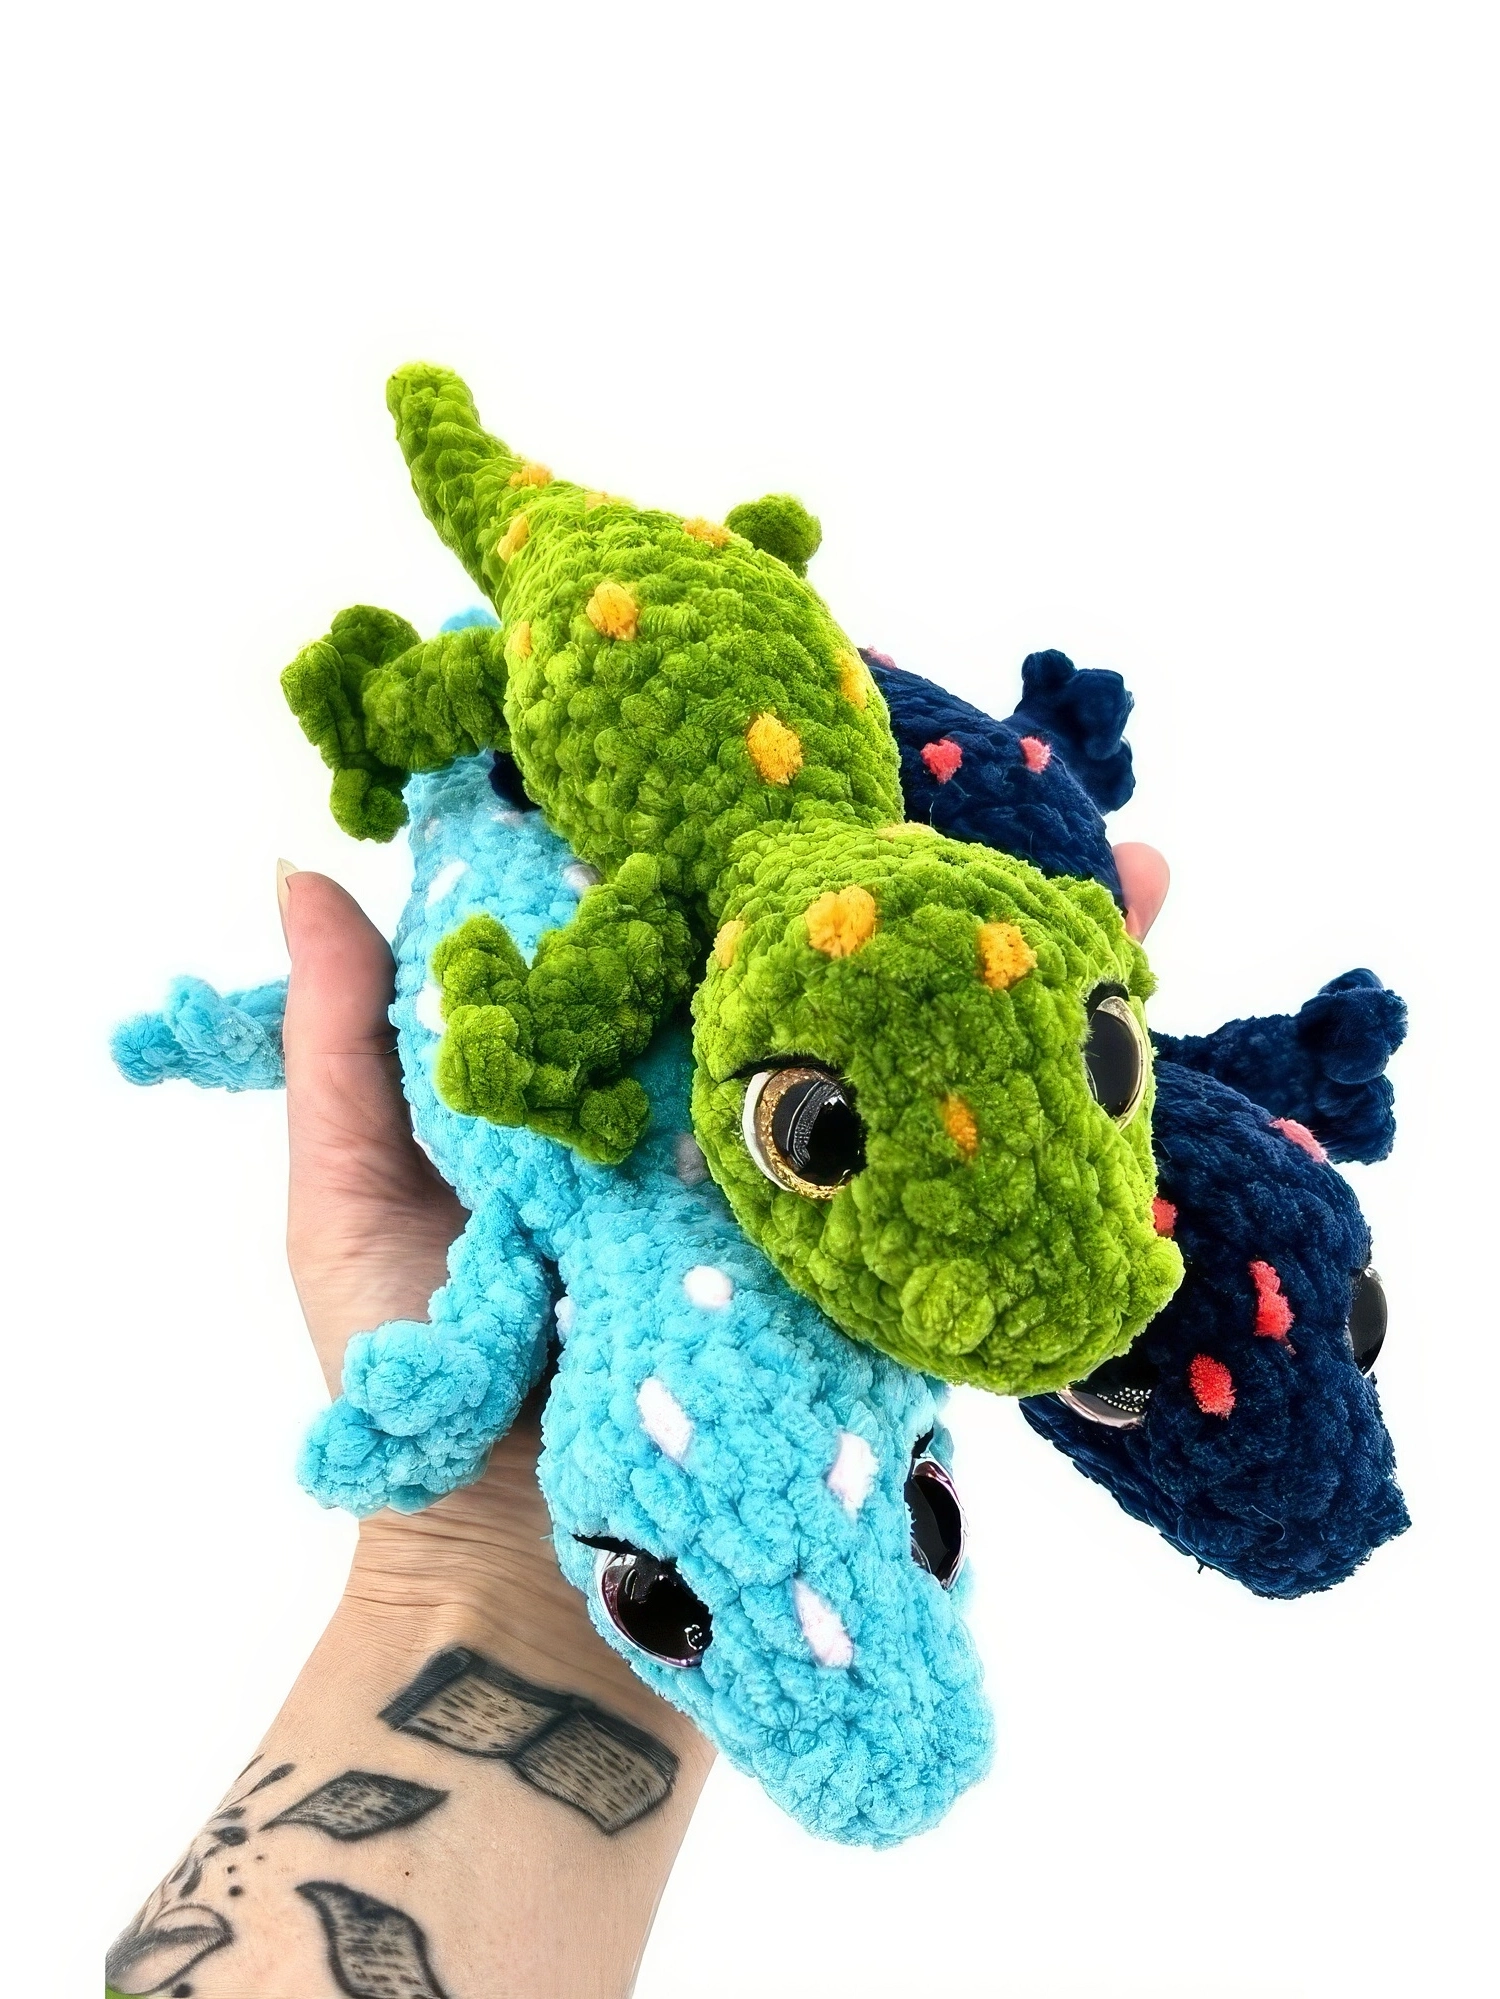
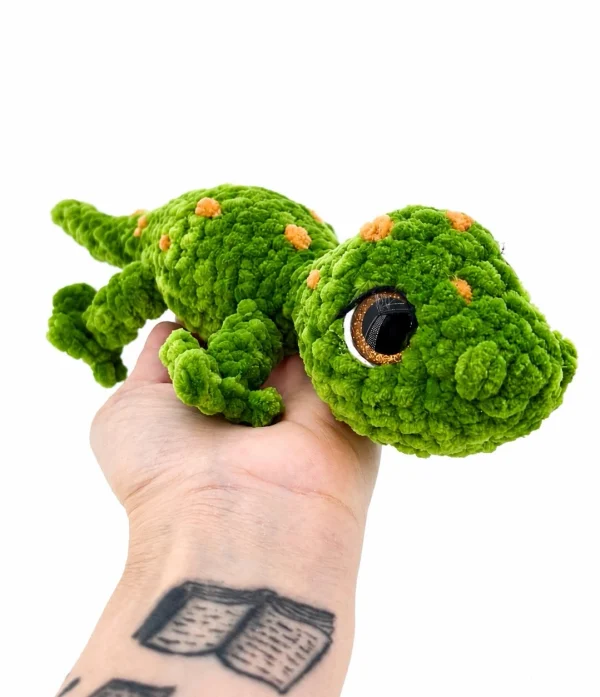
These little lizards look like they just crawled out from under a stone in a tropical forest. You can make them in different colors, green, light blue or dark blue: the pattern is the same, but they all get totally different characters. Each lizard has a long body that slowly narrows into a tail, four short legs with tiny toes, and big shiny eyes that take up half of the face.
To make the lizards you will need chenille yarn, a 4 mm crochet hook, 18 mm safety eyes, stuffing, stitch markers, a yarn needle and cotton thread for the details. Each lizard has a long body that slowly narrows into a tail, four short legs with tiny toes, and big shiny eyes that take up half of the face. The spots are small and simple, so you can place as many or as few as you like
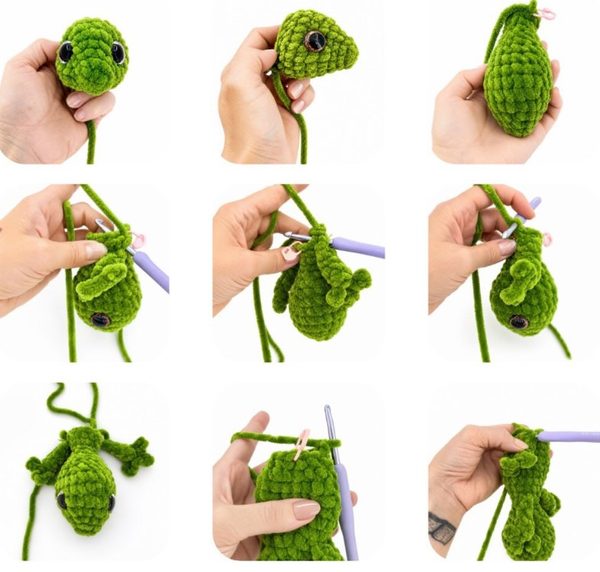
The stitches are just single crochet, increases and decreases. First we start with the 4 legs, then the head and the body, and at the end we add the details, shape the face and put everything together.
Kids love these, and they’re a fun gift for reptile lovers who’d never dare to hold the real thing.
Materials
- Chenille yarn
- Cotton thread for details
- 4 mm crochet hook
- Stuffing
- Stitch markers
- Scissors
- Yarn needle
- 18 mm safety eyes
Abbreviations
Mr – magic ring
sc – single crochet
inc – increase
dec – decrease
sl st – slip stitch
ch – chain
dc – double crochet
BLO – back loops only
FLO – front loops only
Legs x4
Start with green yarn.
Rnd 1: ch 2. Starting in the 2nd ch from hook: 4 sc (4)
In the next round, work only in the back loops of the stitches.
Rnd 2: BLO: 4 sc (4)
Place a stitch marker in the first FLO left unworked in this round. This will be used later to make the toe.
Rnd 3-5: 4 sc (4) (3 rounds)
Rnd 6: fold the piece in half and close it with 2 sc (2)
Do not stuff.
Do not leave a yarn tail, as the legs will be crocheted directly into the body without sewing.
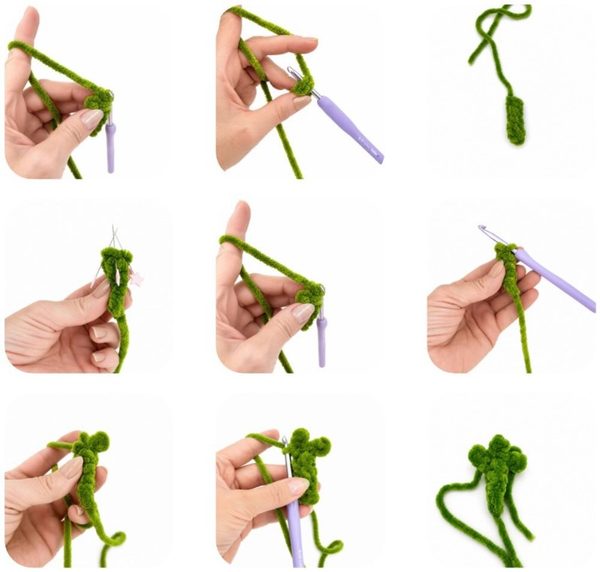
The toes
Make the middle toe in line with the fold.
In the 3 front loops (FLO) left unworked in round 2, make one toe in each loop:
(1 sl st, ch 2, 2 sc in the 2nd ch from the hook, 1 sl st in the same loop) x 3
Head & Body
Start with green yarn.
Rnd 1: ch 2. Starting in the 2nd ch from the hook: 6 sc (6)
Rnd 2: (1 sc, 1 inc) x 3 (9)
Rnd 3: (2 sc, 1 inc) x 3 (12)
Rnd 4: (1 sc, 1 inc) x 6 (18)
Rnd 5: (2 sc, 1 inc) x 6 (24)
Rnd 6-7: 24 sc (24) (2 rounds)
Attach the eyes between rounds 5 and 6, leaving 4 stitches visible between them.
Rnd 8: (2 sc, 1 dec) x 6 (18)
Rnd 9: 18 sc (18)
Start stuffing as you go.
Rnd 10: (1 sc, 1 dec) x 6 (12)
Rnd 11: 12 sc (12)
Rnd 12: (1 sc, 1 dec) x 4 (8)
Rnd 13: 8 sc (8)
Beginning of the body.
Rnd 14: (1 sc, 1 inc) x 4 (12)
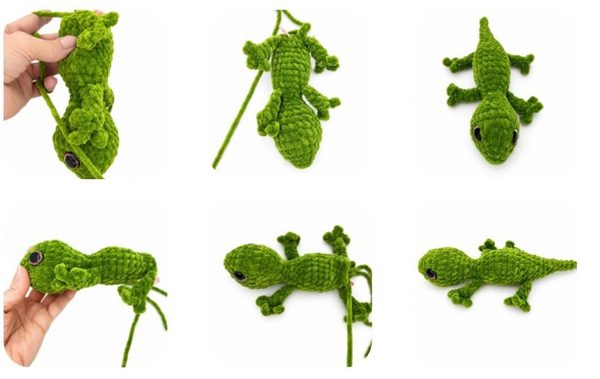
On the next rounds, attach the legs.
Work 1 or 2 additional sc to reach the center of the belly.
Rnd 15: 2 sc, 2 sc through the frist leg, 6 sc, 2 sc through the second leg (12)
Rnd 16: (1 sc, 1 inc) x 6 (18)
Rnd 17: (8 sc, 1 inc) x 2 (20)
Rnd 18-20: 20 sc (20) (3 rounds)
Rnd 21: (8 sc, 1 dec) x 2 (18)
Rnd 22: (7 sc, 1 dec) x 2 (16)
Rnd 23: (6 sc, 1 dec) x 2 (14)
In the next round attach the back legs, making sure they are well centered in relation to the front legs.
Work 1 or 2 additional sc to reach the center of the belly.
Rnd 24: 2 sc, 2 sc with the first leg, 6 sc, 2 sc with the second leg, 2 sc (14)
Rnd 25: (5 sc, 1 dec) x 2 (12)
Stuff firmly.
Rnd 26: (4 sc, 1 dec) x 2 (10)
Rnd 27: (3 sc, 1 dec) x 2 (8)
Rnd 28: (2 sc, 1 dec) x 2 (6)
Rnd 29: 6 sc (6)
Rnd 30: (1 sc, 1 dec) x 2 (4)
Rnd 31-33: 4 sc (4) (3 rounds)
Rnd 34: 2 dec (2)
Fasten off, cut the yarn, and weave in the ends.
Details
- Using cotton thread, embroider the eyelashes.
- Embroider the nostrils between rounds 1 and 2 by simply making two passes of the thread.
- Shape the face to give it more expression.
- Using yarn in a different color, embroider small stitches on the head and back.
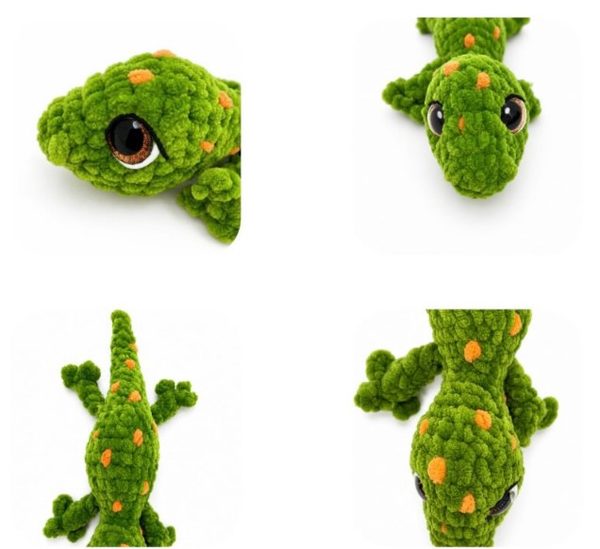
How to shape face (Optional)
1. Enter into the neck.

2. Exit at the bottom right of the left eye, enter at the top right of the left eye.

3. Exit at the top left of the right eye.

4. Enter at the bottom left of the right eye.

5. Exit the needle into the neck next to the first thread.

Done!