
Designer: Sweet Little Buddies
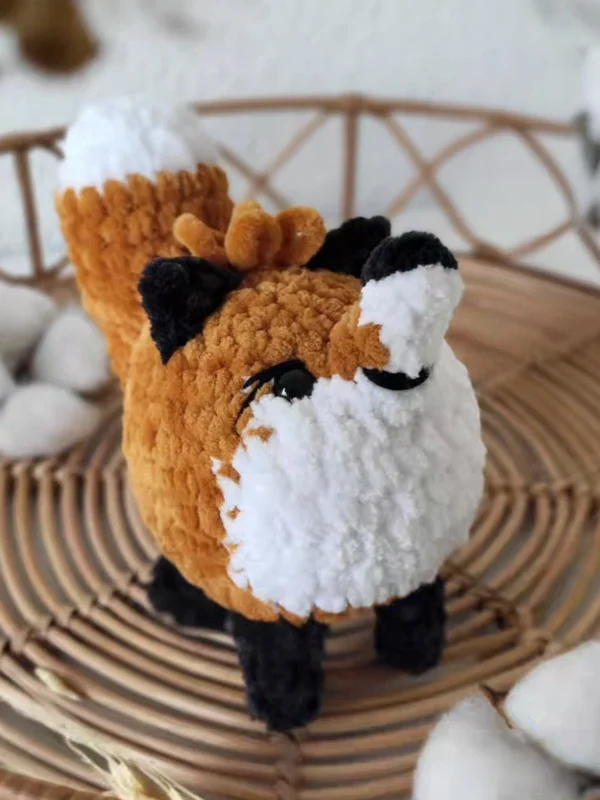
Embrace the charm of the forest with this amigurumi fox crochet pattern! With its fluffy tail, perky ears, and mischievous expression, this design captures the playful spirit of foxes in yarn form.
Materials used are super bulky yarn in black, white, and orange shades, 4 & 5 mm crochet hooks, 8 mm safety eyes, fiberfill, scissors, embroidery thread for eyes and mouth, and a yarn needle.
This tutorial contains how to make the legs, snout, tail, head, ears, hair, and body, and instructions on how to make the tail. The result looks way more impressive than the effort it actually takes, which is always a win.
You can display it in woodland, forest, or animal-themed décor arrangements, or place it on shelves, desks, or display areas.
Materials
- 4 mm & 5 mm crochet hook
- Super bulky (6) yarn: black, white, orange colors
- Stuffing
- Darning needle
- 8 mm safety eyes
- Scissors
- Stitch markers
- Embroidery thread (black)
Abbreviations
The pattern is worked in continuous rounds.
Mr – magic ring
sc – single crochet
inc – increase
dec – decrease
BLO – back loops only
ch – chain
FLO – front loops only
sl st – slip stitch
st(s) – stitch(es)
Legs x4
With black yarn, use a 5 mm hook:
Rnd 1: 4 sc in Mr (4)
Rnd 2: 4 sc (4)
Rnd 3: (1 sc, inc) x 2 (6)
Rnd 4: 6 sc (6)
Do not stuff. Fasten off, leaving a short tail. The legs will be crocheted into the body.

Snout
With orange and white yarn (bolded), use a 4 mm crochet hook:
Rnd 1: 4 sc in Mr (4)
Rnd 2: (1 sc, inc) x 2 (6)
Rnd 3: 3 sc, 3 sc (6)
Rnd 4: sc, inc, sc, sc, inc, sc (8)
Do not stuff. Fasten off, leaving one orange and one white tail for sewing.
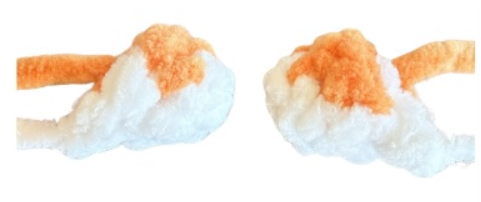
Tail
With orange yarn and white yarn (bolded), use a 5 mm hook:
Stuff very lightly!
Rnd 1: 4 sc in Mr (4)
Rnd 2: 4 sc (4)
Rnd 3: (1 sc, inc) x 2 (6)
Rnd 4: (1 sc, inc) x 3 (9)
Rnd 5: 9 sc (9)
Rnd 6: (2 sc, inc) x 3 (12)
Rnd 7: (2 sc, inc) x 4 (16)
Color change to orange. Start stuffing very lightly (R15-19 little to no stuffing).
Rnd 8-12: 16 sc (16) (5 rounds)
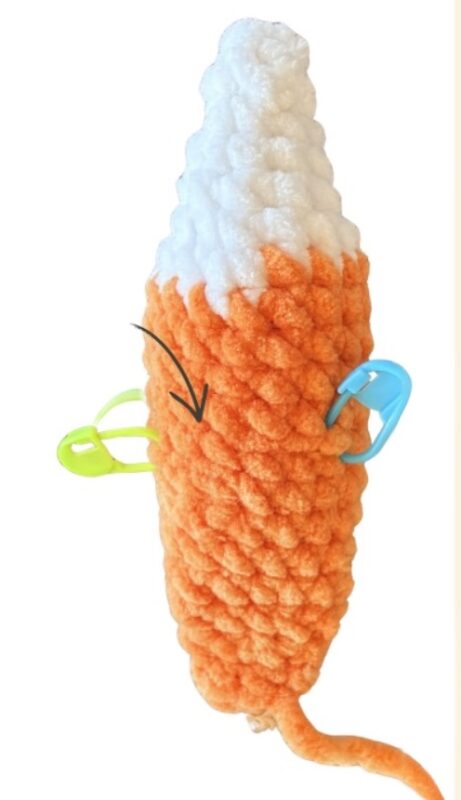
Rnd 13: 5 sc, BLO: 6 sc, all loops: 5 sc (16)
Note on R13: Written instructions are for the upright curled tail. If you want to have a hanging tail, crochet just 16 sc in R13.
Rnd 14: (6 sc, dec) x 2 (14)
Rnd 15: 14 sc (14)
Rnd 16: (5 sc, dec) x 2 (12)
Rnd 17: 12 sc (12)
Rnd 18: (2 sc, dec) x 3 (9)
Rnd 19: (1 sc, dec) x 3 (6)
Fold in half and sc 3 through both sides.
Make sure the 3sc line up with the FL of R13, forming two parallel lines. Adjust if needed.
Fasten off, the tail will be crocheted into the body.
Head & Body
With orange yarn and white yarn (bolded), use a 5 mm hook:
Rnd 1: 8 sc in Mr (8)
Rnd 2: 8 inc (16)
Rnd 3: (1 sc, inc) x 8 (24)
You will attach the legs in the next round. Crochet first through 2 layers of the leg and one layer of the body.
Crochet over the yarn tails to secure them.
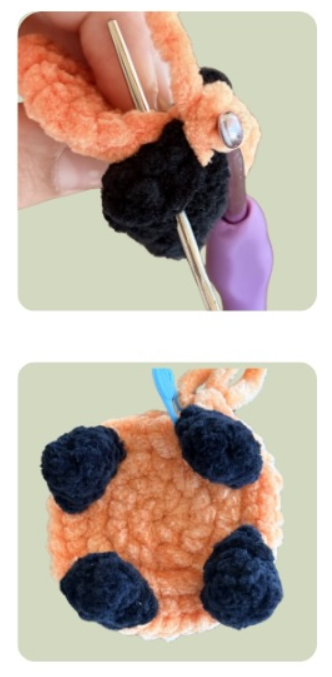
Rnd 4: (inc, sc, inc, 3 sc with leg) x 4 (32)
You will attach the tail in the next round. Crochet first through the tail, then through the body.
The FLO from R13 of the tail should be facing you.
Rnd 5: 6 sc, sc, inc, 7 sc, inc, 7 sc, inc, sc, 3 sc with tail, 3 sc, inc (36)
Rnd 6-9: 5 sc, 11 sc, 19 sc (36) (4 rounds)
Rnd 10: 4 sc, dec, sc, 3 sc, dec, 4 sc, dec, (4 sc, dec) x 3 (30)
Rnd 11: 6 sc, 8 sc, 16 sc (30)
Rnd 12: (3 sc, dec) x 6 (24)
You will attach R13 of the tail in the next round. Crochet first through the marked FLO of R13 then through the body.
Rnd 13: 18 sc, 6 sc with FLO of the tail (24)
Place 8 mm safety eyes between R11-12, about 5 sts apart.
Stuff firmly and continue as you go.
Rnd 14: (2 sc, dec) x 6 (18)
Rnd 15: (1 sc, dec) x 6 (12)
Rnd 16: 6 dec (6)
Fasten off leaving a long end and close the hole by threading it throught the FLO of the remaining sts. Do not cut off yet.
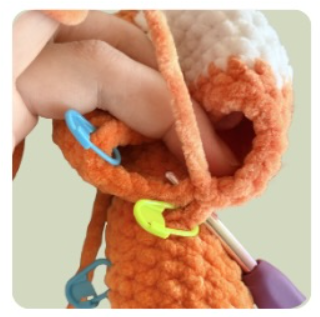
Forming the Tail
Use the remaining yarn end from the body.
- Bring the yarn end through the body and out at the back of the tail, centered between R9-10.
- Insert the needle back between R4-5 and bring it out between R2-3.
- Insert the needle back between R9-10. Pull tightly so the tip of the tail bends. You can also use the yarn tail to reinforce R13, where the FLO of the tail were attached to the body. Secure the end inside the body.
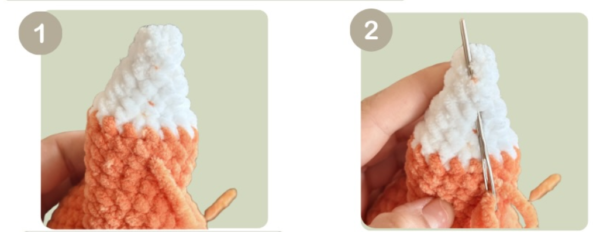
Sewing the Snout
Use the orange end to sew the orange sts. Use the white end to sew the white sts.
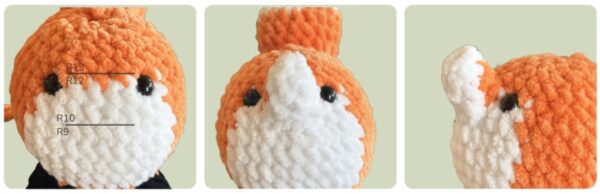
- Sew between the eyes and between R9-13.
- Sew orange part with orange yarn end between R12-13.
- Sew white part with white yarn end between R9-10.
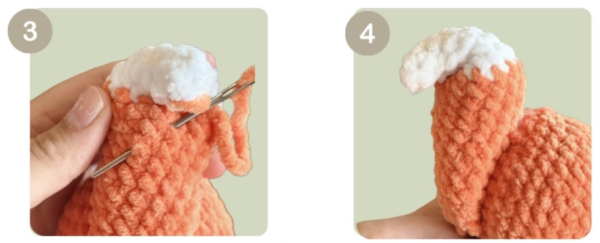
- Secure the ends and hide them inside the body.
- Embroider the snout with black yarn between R2-3. Go a few times over 2-3 sts until you cover up the white upper part of the snout. Secure the ends and hide them inside the body.
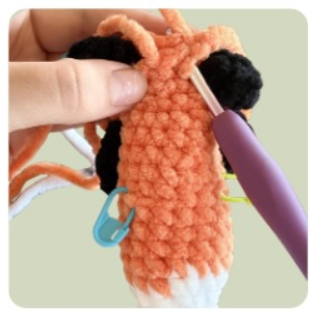
Ears x2
With black yarn, use a 4 mm hook:
Starting from the eye, count 4 sts to the left/right and 4 rounds up. Mark those 2 points with pins.
Viven’s right ear: fox is facing you.
Viven’s left ear: fox is facing away.
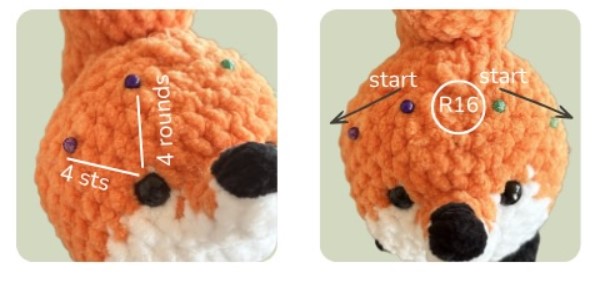
Rnd 1: insert your hook in the upper marked st, pull up a loop and ch 2 (this will be your 1 st st). Continue surface crocheting 3 sc until you reach the lower pin (4)
Rnd 2: turn, 2 dec (2)
Rnd 3: turn, dec (1)
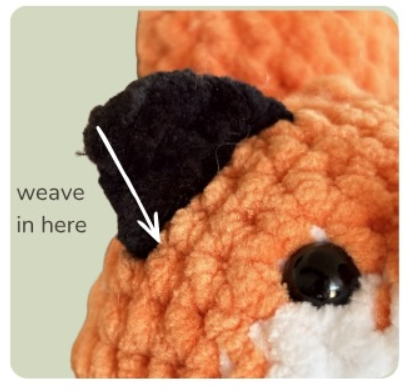
Fasten off, weave the yarn end through the outside of the ear until you reach the head. Secure both ends and hide them inside the body.
Repeat for the second ear.
Hair
With orange yarn, use a 4 mm hook:
- Pull up a loop between the ears and ch 1. Pull the chain up to create a larger loop – this will be the first hair strand. Remove your hook from the loop.
- Insert the hook into the head again, pull up another loop, and ch 1. Hold the first loop in place to keep it from changing size.
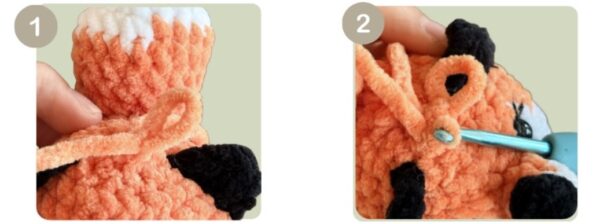
- Pull the 2nd ch loop to match the size of the 1st hair strand. Repeat until you have 4 or more hair strands.
- To finish, insert the hook into the head one more time, ch 1, and fasten off.

Embroidery
With black cotton yarn.
Embroider two lines above both eyes, starting at the top of the eye.
1st line: 2 rounds down, 2 sts to the side
2nd line: 1 round down, 1 st to the side
Embroider the mouth between R3-4 of the snout.

