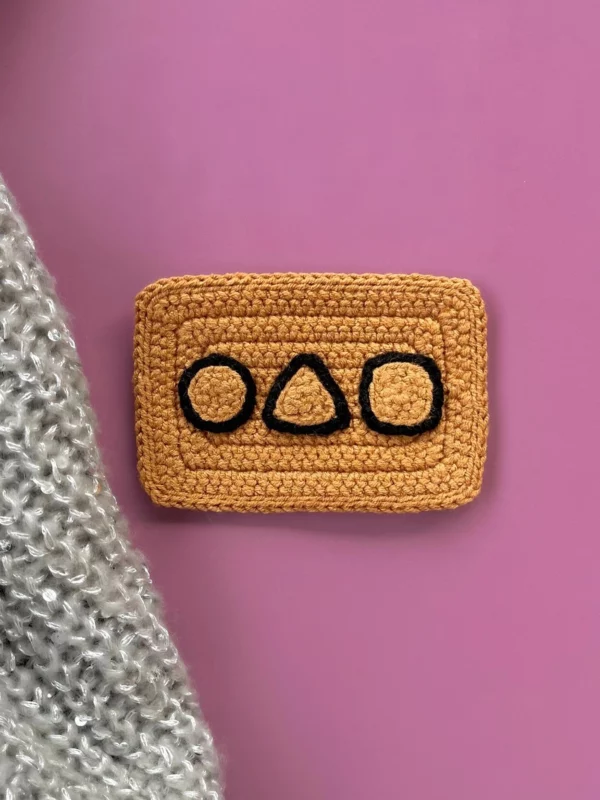
We all remember the popular series Squid Game, where the story of the main hero started with accepting the invitation card to the game. So today we will crochet a pattern of this famous card.
Using simple stitches like sc and ch you will create your own card with three embroidered symbols – triangle, square, and circle. First you make the base, and then sew the symbols on top. You can customize the card color, the shape, or even change the order of the symbols how you like.
Materials needed are a 2.2 mm crochet hook, four-ply yarn in brown and black colors, and scissors.
It makes a fun and unexpected gift for fans of the series, can be used as decor, or just a small handmade present for movie lovers.
Designer: Tinunturu d’Alice
Materials
- Light brown 4ply Milkcotton Yarn
- BLack 4ply Milkcotton Yarn
- 2.2 mm crochet hook
- Tapestry needle
- Stitch markers
- Scissors
- Pin needles
Abbreviations
sc – single crochet
inc – increase
inv bo – invisible bind off
Mr – magic ring
PM – place marker
sl st – slip stitch
SK – skip
BLO – back loop only
BO – bind off
ch – chain
dec – decrease
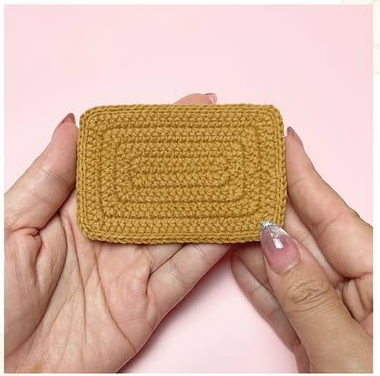
Rectangle Card
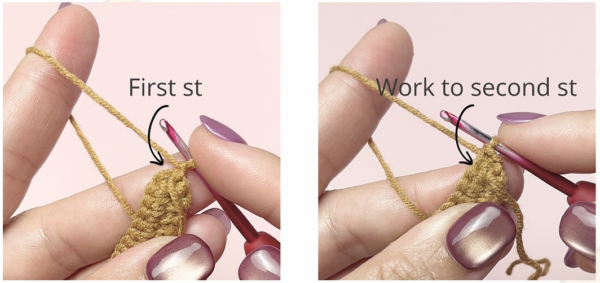
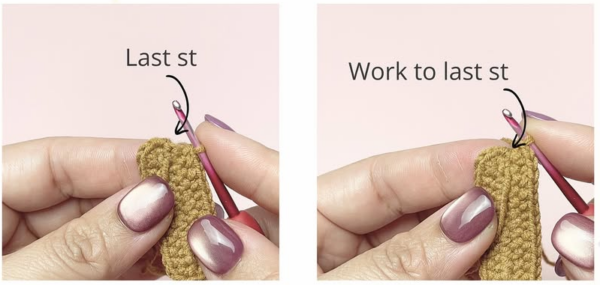
Rnd 1: with light brown yarn, ch 11, inc to second st from hook, 8 sc, 5 sc into last st. Working on the back side, 8 sc, inc to last st. Sl st to ch 1 (25)
Rnd 2: ch 1, turn. Sk first st, 3 sc in next st, 10 sc, 3 sc in next st, sc, 3 sc in next st, 10 sc, 3 sc in last st. Sl st to ch 1 (33)
Rnd 3: ch 1, turn. Sk first st, sc, 3 sc in next st, 12 sc, 3 sc in next st, 3 sc, 3 sc in next st, 12 sc, 3 sc in next st, sc. Sl st to ch 1 (41)
Rnd 4: ch 1, turn. Sk first st, 2 sc, 3 sc in next st, 14 sc, 3 sc in next st, 5 sc, 3 sc in next st, 14 sc, 3 sc in next st, 2 sc. Sl st to ch 1 (49)
Rnd 5: ch 1, turn. Sk first st, 3 sc, 3 sc in next st, 16 sc, 3 sc in next st, 7 sc, 3 sc in next st, 16 sc, 3 sc in next st, 3 sc. Sl st to ch 1 (57)
Rnd 6: ch 1, turn. Sk first st, 4 sc, 3 sc in next st, 18 sc, 3 sc in next st, 9 sc, 3 sc in next st, 18 sc, 3 sc in next st, 4 sc, Sl st to ch 1 (65)
Rnd 7: ch 1, turn. Sk first st, 5 sc, 3 sc in next st, 20 sc, 3 sc in next st, 11 sc, 3 sc in next st, 20 sc, 3 sc in next st, 5 sc. SL st to ch 1 (73)
Rnd 8: ch 1, turn. Sk first st, 6 sc, 3 sc in next st (PM to the middle st of increase/corner), 22 sc, 3 sc in next st (PM to the middle st of increase/corner), 13 sc, 3 sc in next st (PM to the middle st of increase/corner), 22 sc, 3 sc in next st (PM to the middle st of increae/corner), 6 sc. SL st to ch 1 (81)
Cut yarn and make an inv bo.
BLO st st around the edge (you can start at any st), and add 1 ch at each marker.
Cut yarn and make an inv bo.
Round Symbol
Rnd 1: with light brown yarn, 6 sc into Mr. Sl st to first st (6)
Rnd 2: ch 1, turn. Inc x 6 (12)
Cut yarn and make an inv bo.
With black yarn, BLO sl st around the edge.
Cut yarn and make an inv bo.
Triangle Symbol
Rnd 1: with light brown yarn, ch 5. Sc into the second ch from hook, dc, tr, dtr (4)
Now you’ll be working on the edge. (ch 1, 4 sl st) x 3 (15)
Cut yarn and make an INV BO.
With black yarn, BLO sl st around the edge.
Cut yarn and make an INV BO.
Square Symbol
Rnd 1: with light brown yarn, 8 sc into Mr. Sl st to first st (8)
Rnd 2: ch 1, turn. (sc, 3 sc in next st) x 4 (16)
Cut yarn and make an INV BO.
With black yarn, BLO sl st around the edge.
Cut yarn and make an INV BO.
Assembly
- Block all pieces. Spray a little water and a low heat iron on the pieces.
- Sew all 3 symbols to the rectangle card.