
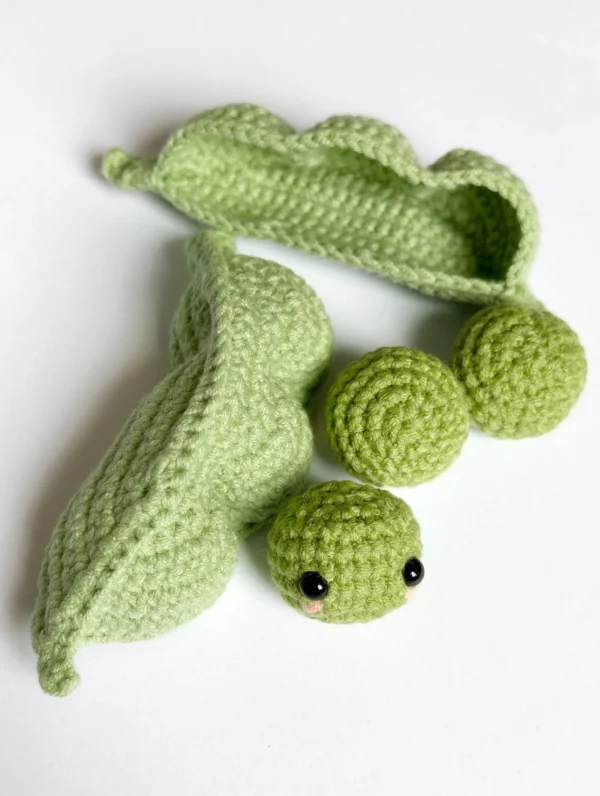
Crochet a cute pea pod with little peas inside. It’s an adorable amigurumi project, it’s perfect for play food, gifts, or fun home decor.
It’s ideal for last-minute gifts because it’s small, simple, and can be completed in about one hour. It consists of 3 small crochet balls and a little avoid container for the peas.
This tutorial contains how to make peas, pod top, pod bottom, and steps for how to assemble all parts with a photo tutorial.
All you need to know before working on this pattern is how to make a single crochet stitch, and you need to know how to increase and decrease
It would make a fun piece of home/nursery décor or a great addition to play kitchens.
Designer: FloeCreation Crochet
Materials
- 2.5 mm crochet hook
- 60% cotton + 40% acrylic 4-ply size 2 (sport weight) yarn in colors:
- Green (peas), light green (pea pod), pink (blushes)
- Polyester fiberfill
- Yarn needle
- Scissors
- Safety eyes
- Stitch marker
Size: 4 cm x 10.5 cm with pea pod.
Abbreviations
Mr – magic ring
sc – single crochet
inc – increase
dec – decrease
ch – chain
FO – fasten off
Pea x3
Green, pink (embroidering)
Rnd 1: 6 sc into a Mr (6)
Rnd 2: 6 inc (12)
Rnd 3: (sc, inc) x 6 (18)
Rnd 4: (sc, inc, sc) x 6 (24)
Rnd 5-7: 24 sc (3 rounds) (24)
Rnd 8: (sc, dec, sc) x 6 (18)
Stuff as you go. If you are adding the facial details to the pea, insert safety eyes between R5 and R6, about 5 stitch holes apart. Use pink yarn to embroidr 2 lines of blushes under the eyes.
Rnd 9: (sc, dec) x 6 (12)
Rnd 10: 6 dec (6)
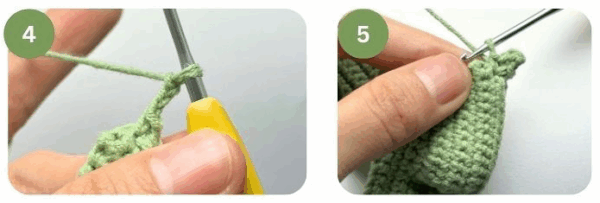
FO through the front loops on Rnd 10 to close the opening. Weave in the excess.
Pod Bottom
Light green.
Row 1: ch 16, start from the 2nd ch from the hook, work on the back bumps, 1 sc (15)
Row 2: inc, 13 sc, inc (17)
Row 3: inc, 15 sc, inc (19)
Row 4: inc, 17 sc, inc (21)
Row 5: inc, 19 sc, inc (23)
Row 6: inc, 21 sc, inc (25)
Row 7: inc, 23 sc, inc (27)
Row 8: inc, 25 sc, inc (29)
Row 9: 29 sc (29)
Row 10: dec, 8 sc, dec, 5 sc, dec, 8 sc, dec (25)
FO and cut the yarn.
Pod Top
Light green.
Row 1: ch 16, start from the 2nd ch from the hook, work on the back bumps, 15 sc (15)
Row 2: inc, 13 sc, inc (17)
Row 3: inc, 15 sc, inc (19)
Row 4: inc, sc, (sc, 3 inc, sc) x 3, sc, inc (30)
Row 5: inc, 2 sc, (sc, sc, inc, sc, inc, sc, inc, sc) x 3, 2 sc, inc (41)
Row 6: inc, 12 sc, dec, 11 sc, dec, 12 sc, inc (41)
Row 7: inc, 13 sc, dec, 9 sc, dec, 13 sc, inc (41)
Row 8: inc, 12 sc, dec, 11 sc, dec, 12 sc, inc (41)
Row 9: 41 sc (41)
Row 10: dec, 12 sc, dec, 9 sc, dec, 12 sc, dec (37)
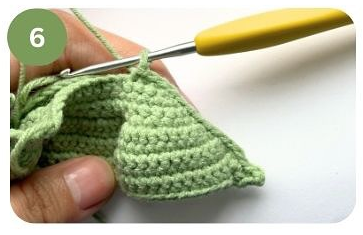
Do not FO. Place the pod bottom piece under the current piece, and work through both layers around the edge.

- sc, 3 ch, starting from the 2nd ch from the hook, work 2 sc in the back bumps, sc into the same stitch where you began the ch
- Continue making 1 sc in each of the remaining stitches around the edge.
- Lastly, sc, 3 ch, starting from the 2nd ch from the hook, work 2 sc in the back bumps, sc into the same stitch where you began the ch.
- FO.
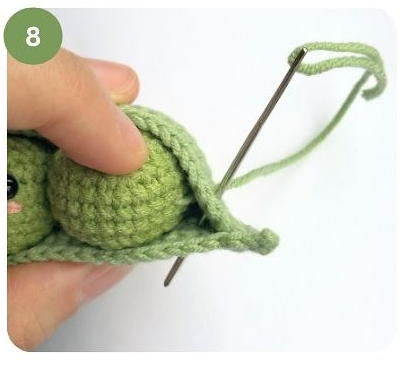
Cut a strand of light green yarn about 3x the length of the pea pod. Thread a yarn needle and pass it through all 3 peas, sliding them to the center of the strand. Place the peas inside the pod.
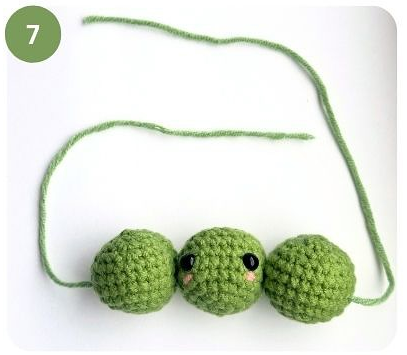
Use the 2 yarn ends to secure them as follows:
- Make a few stitches at the “x” marked point, sewing through both layers.
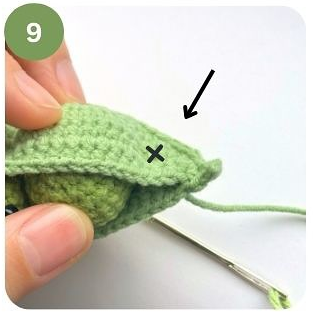
- Then make 2-3 Whip Stitches alng the pod’s edge. FO and weave in the ends.
- Repeat on the other side.
The pears are now attached! You can roll them over to show the back. If you prefer the peas to stay loose so that they can be swapped around, skip threading them and just make Whip Stitches at both ends of the pod. For extra security, you can also sew each pea in place.
