Designer: Avary Crochets
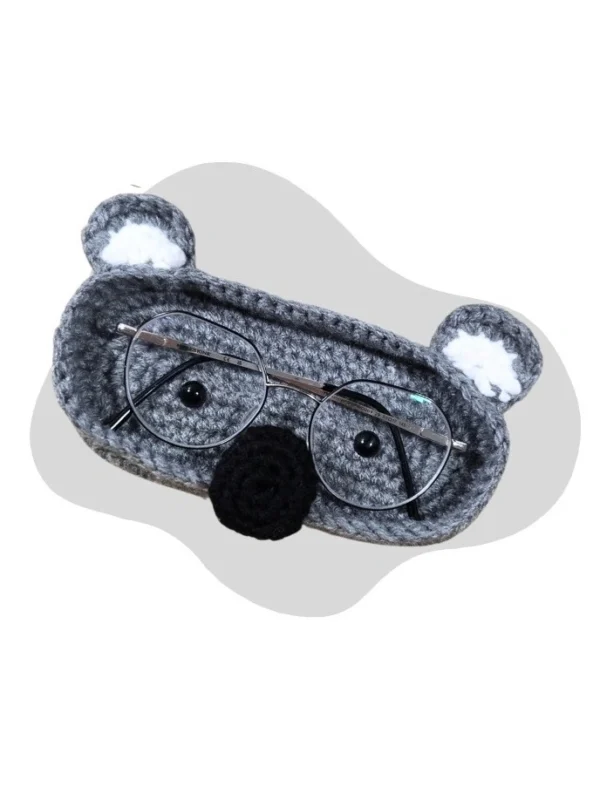
Meet the most cute and cozy way to store your glasses. This is a holder in the form of a koala, which is at the same time practical and charming, just look at these ears and little face.
The difficulty of this pattern is beginner-intermediate level, using basic techniques like crocheting in the round, increases and decreases, and a little bit of sewing to make the holder sturdy.
You will need a 3.5 mm hook, acrylic yarn in white, black and gray colors, 10 mm safety eyes, sewing needle and scissors.
The holder can make a wonderful gift for koala lovers or those who wear glasses, and will also find its place on your bedside table.
Materials
- 3.5 mm crochet hook
- Yarn medium (4):
- Loops & Threads Soft Classic Acrylic Dark Grey
- Loops & Threads Soft Classic Acrylic Black
- Loops & Threads Soft Classic Acrylic White
- Sewing needle
- Scissors
- 10 mm safety eyes
Abbreviations
sc – single crochet
mr – magic ring
inc – increase
dec – decrease
dc – double crochet
hdc – half double crochet
ch – chain
Tension and hook size matter since this is a functional crochet piece. After R5 of the base, measure your piece. It should measure approx: 5 cm by 15 cm.
- To make your case bigger: Increase hook size of use a bigger yarn.
- To make case smaller: decrease hook size or use a smaller yarn.
Ears x2
Inner Piece
Using white yarn Ch 4 (begin in 2nd chain from hook)
Rnd 1: 1 sc, inc, 1 sc (4) ch1 and turn
Rnd 2: 1 sc, inc x 2, 1 sc (6)
Fasten off (you don’t need a long tail)
Outer Piece
Using grey yarn CH4 (begin in 2nd chain from hook)
Rnd 1: 1 sc, inc, 1 sc (4) ch1 and turn
Rnd 2: 1 sc, inc x 2, 1 sc (6)
Rnd 3: you will crochet both the white and grey pieces together to combine them.
1 sc into the start of the chain 4 (in R1 of the white piece)
ch 1, turn, skip the ch 1 and 1 stitch continue with
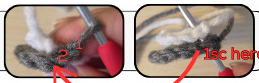
1 sc, hdc inc, dc inc x 2, hdc inc, sc
1 sc both stitches together into gap where we began the chain
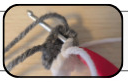
Stuff the tail ends in between the white and grey pieces we crocheted together.
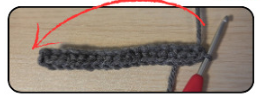
Base x2
Using grey yarn.
Ch 17, begin in 2nd chain from hook.
Rnd 1: inc, 13 sc, inc, an the other side of the chain, inc, 14 sc, inc (36)
Rnd 2: inc x 2, 14 sc, inc x 4, 14 sc, inc x 2 (44)
Rnd 3: (1 sc, inc) x 2, 15 sc, (inc, 1 sc) x 3, inc, 15 sc, inc, 1 sc, inc (52)
Rnd 4: (2 sc, inc) x 2, 16 sc, (inc, 2 sc) x 3, inc, 16 sc, inc, 2 sc, inc (60)
Rnd 5: 1 sc, (inc, 1 sc) x 2, 1 sc, inc, 18 sc, inc, 2 sc, (inc, 1 sc) x 2, inc, 2 sc, inc, 20 sc, inc, 2 sc, inc (70)
Fasten off first piece, continue to next part with 2nd piece.
Measure your base. It should be apporx 5 cm by 15 cm.
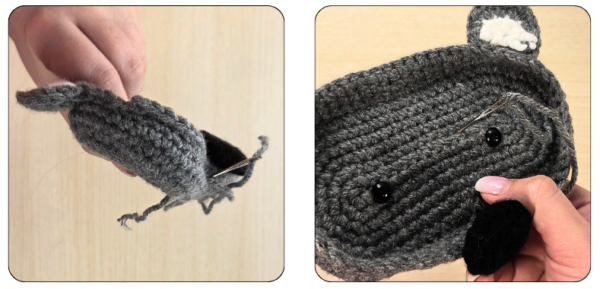
Insert eyes into the first piece. They shoulld be placed in the 2nd row (1 row down from the center), about 10 stitches apart.
Crochet both pieces together in R6 (wrong side facing in).
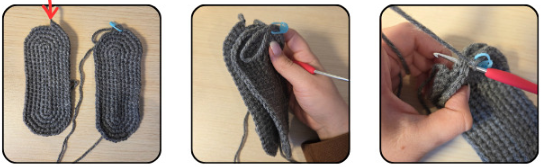
Join 1st piece about 3 sc before the last stitch of where the 1st piece finished.
Rnd 6: 70 sc (70) (both pieces)
Do not stuff.
Rnd 7: 4 sc, dec, (10 sc, dec) x 2, 9 sc, dec, (10 sc, dec) x 2, 5 sc (64)
Rnd 8: 64 sc (64)
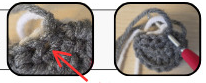
Attach the ears n the next round.
Rnd 9: 4 sc, (with ear and glasses case 5 sc), 15 sc, (with ear and glasses case 5 sc), 35 sc (64)
Base of the ear. Do not crochet into the white.
Slip stitch into the starting stitch. Fasten off and hide the ends.
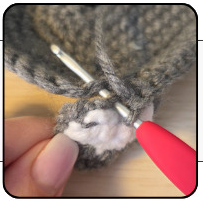
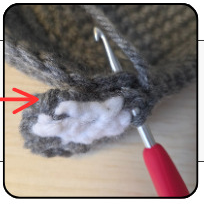
Nose
Rnd 1: 6 sc in Mr (6)
Rnd 2: inc x 6 (12)
Rnd 3: (inc x 3, 3 sc) x 2 (18)
Rnd 4: 1 sc, inc, 2 sc, inc, 5 sc, inc, 2 sc, inc, 4 sc (22)
Rnd 5: dec x 11 (11)
Rnd 6: dec x 5, 1 sc (6)
Do not stuff.
Fasten off and sew onto the bottom center of the face, into round 9.
Sew a couple of stitches up through the nose and back down, to hold the nose flat.
Sewing
The purpose of this final step is to secure the base and the front of the lip.
Using the same color as your case, sew the pieces of the base together. Specifically sew around R2, as the this gave the most security to keep the eyes from moving.
Then, sew the front lip of the case down onto the base. This will help strenghten the base from falling forward with the weight of the nose.