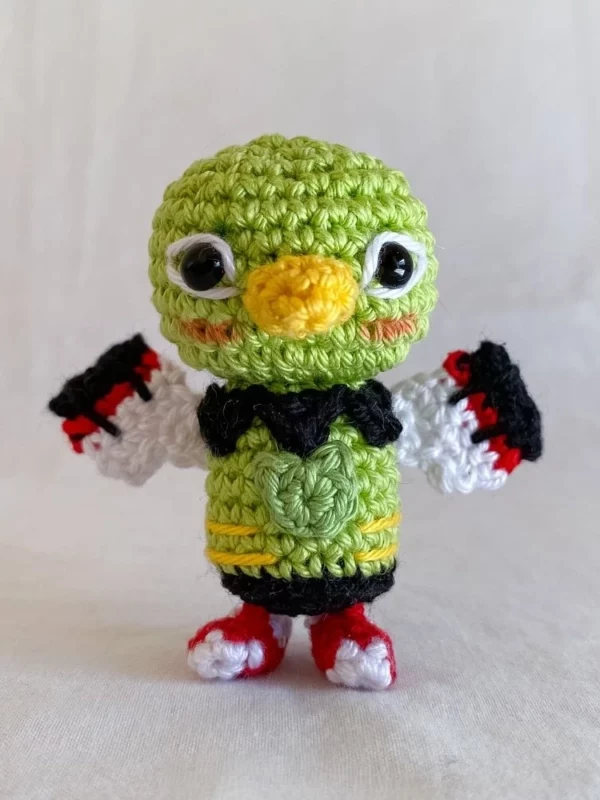
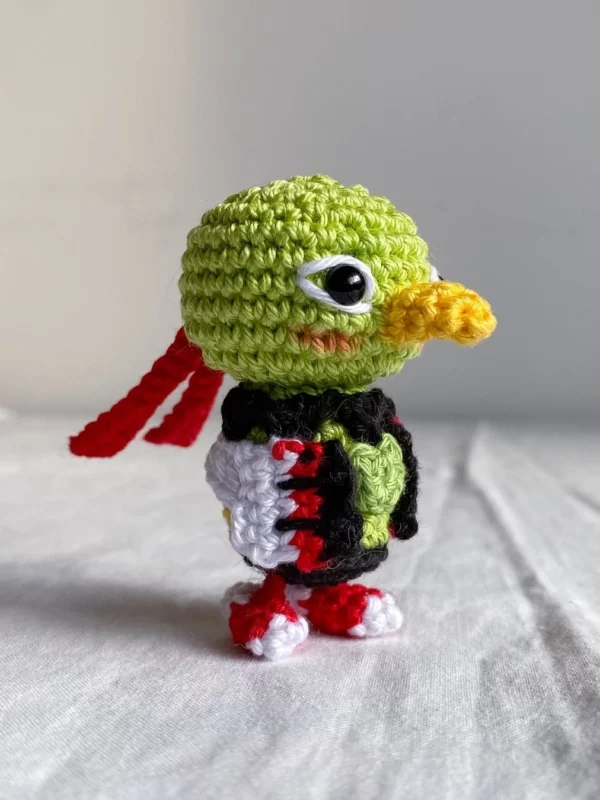
Create your own mystical XATU with this detailed crochet pattern! Designed for amigurumi lovers and collectors, fans, and character design lovers.
This tutorial contains how to make the head, body, wings, ribbons on the back of the head, beak, and foot, and a photo tutorial about how to assemble all parts.
Materials needed to finish this amigurumi are cotton yarn, a 2.5 – 3 mm crochet hook, safety eyes, a yarn needle, and stuffing.
Stitches needed to finish the tutorial are the single crochet stitch, half double crochet stitch, and some crochet techniques like increasing, decreasing, and working in the back loop only.
Designer: Amigurumi Amo
Materials
- 2.5 / 3 mm crochet hook
- Cotton yarn
- Yarn needle
- Stuffing
- 0.5 mm safety eyes
Abbreviations
ch – chain
st – stitch
sl st – slip stitch
sc – single crochet
hdc – hald double crochet
BLO – back loop only
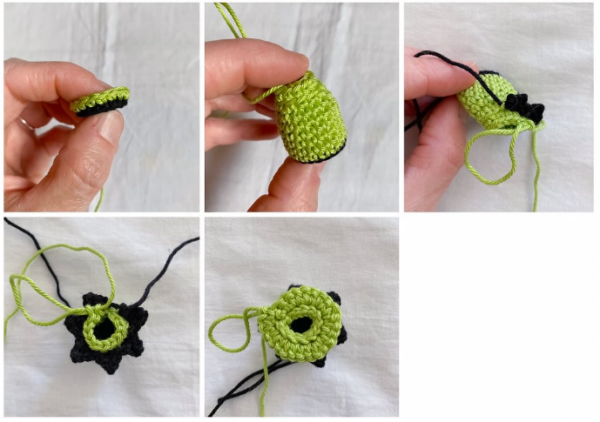
Head + Body
Until round 11 end each round with a sl st in the first st of the previous round, ch and work the first st of the next round in the same st. From round 12 work in continuous rounds.
To realize the picot work a sl st in the closing loop of the stitch (hdc or sc).
Black yarn.
Rnd 1: 6 sc in magic loop (6)
Rnd 2: inc x 6 (12)
Rnd 3: (1 sc, 1 inc) x 6 (18)
Change color and use green yarn.
Rnd 4: BLO: 18 sc (18)
Rnd 5-8: 18 sc (18)
Rnd 9: (4 sc, 1 dec) x 3 (15)
Rnd 10: (3 sc, 1 dec) x 3 (12)
Rnd 11: BLO: 12 sc (12)
Pause the work with green (body + head) and work the black part of the neck.
Join the thread on the back and work FLO on round 11: insert the hook in the first front loop and work in the same st -> sc/hdc+picot/sc, sl st in the next. Repeat 5 times more (total 6 “points”)
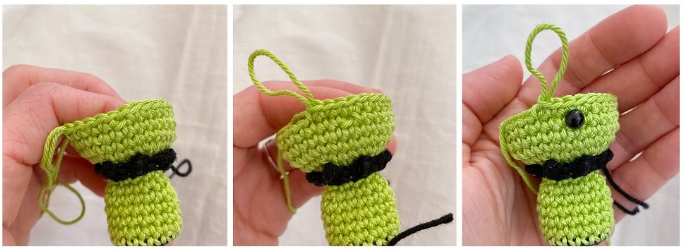
Continue with green and realize the head.
Rnd 1: sl st x 12 (12)
Rnd 2: inc x 6 (24)
Rnd 3: (3 sc, 1 inc) x 6 (30)
Rnd 4: (30)
Rnd 5: (30)
Rnd 6: 16 sc, ch and skip a st, sc 5, ch and skip a st, 7 sc (30) (in next round work sc in ch 1, in the holes you have to insert the safety eyes)
Rnd 7: (30)
Rnd 8: (30)
Rnd 9: (3 sc, dec) x 6 (24)
Rnd 10: (2 sc, dec) x 6 (18)
Rnd 11: (sc, dec) x 6 (12)
Rnd 12: dec x 6 (6)
Cut off and secure.
“Little cat shape” on the front of the body.
Work in magic loop: 2 sc, hdc+picot, sl st, hdc+picot, 2 sc. Sew or glue it on the front of the body.
Wings x2
Left Wing
Work in rows. At the end of each row work ch and turn.
Black ch 5 + 1, sc in the second ch and work sc 5
Red 5 sc
White 5 sc, work 2 rows
Ch 5 + 1, sc in the second ch from hook, sc, sc, hdc, dc join with sl st to the fourth st of the last white horizontal row, sl st in the next st.
Right Wing
Work in rows. At the end of each row work ch and turn.
Black ch 5 + 1, sc in the second ch and work 5 sc
Red 5 sc
White 5 sc work 2 rows.
2 sl st, ch 5 + 1, sc in the second ch from hook, sc, sc, hdc, dc join with sl st to the last sc of the last white horizontal row.
Cut off the threads and secure. Embroider two vertical lines.
Ribbons on the back of the Head x2
Ch 10 + 3
Sl st in the second ch, hdc in the third ch, hdc, hdc, hdc, 5 sc, sl st
Cut off and leave a long tail to sew.
Beak in Yellow
Rnd 1: 4 sc in a Mr (4)
Rnd 2: (1 sc, 1 inc) x 3 (6)
Rnd 3: (1 sc, 1 inc) x 3 (9)
Rnd 4: (9)
Cut off and eave a long tail to sew the beak between the eyes.
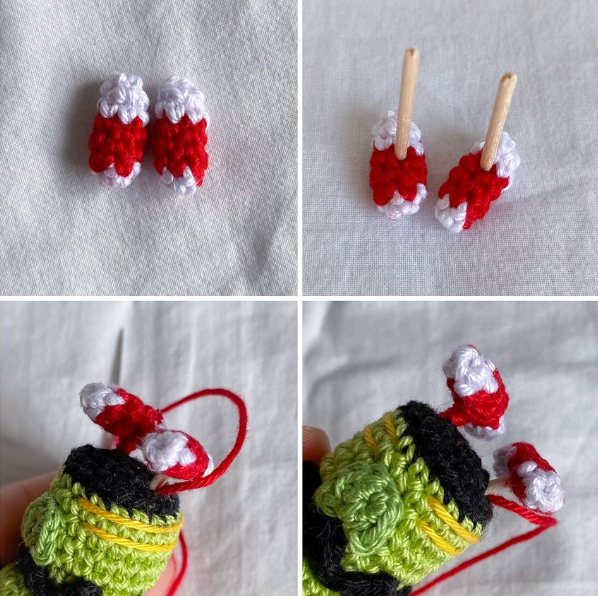
Foot x2
White 4 sc in Mr, the change color and use red
Red sc, inc x 3 (6)
Red (6), change color and use white
White sc, dec x 3 (4)
Cut off and secure.
Insert a little piece of toothpick in the foot and insert the other side of the toothpick in the base of the body. Glue and cover the “leg” with red thread.
Embroider the edge of the eyes with white thread, color the cheeks with red paste.
With yellow thread embroider the edge of the body.